
Petrol Chainsaws 101: Benefits and Unpacking Instructions

Applicable Models from
SX25 10″ (Smallest) | SX38 16″  | SX45 18″ | SX52 20″ |
SX62 20″  | SX75 22″ | SX82 24″ |
Lawn-and-garden professionals and handypersons alike need petrol chainsaws. They can go anywhere: storage unit, work locker, garage, even ute. Simple tasks become simple with a chainsaw. To clear overhanging branches, prepare firewood, and remove bushfire hazards, use a Baumr-AG chainsaw.

Assembly of your petrol chainsaw
Assembly: While most petrol chainsaws equipment requires minimal assembly, the requirements vary by model. Unpack all components and check their receipt before assembling.
You will need to remove the chain drive cover from the chainsaw body. If the surface is stuck, disengage the chain brake by pulling the chain brake handle back towards the machine body. Most models have a helpful log spike, and to install a log spike, place it in front of the machine body and secure it with the supplied fasteners.
Stopping unwanted vibrations with a dampener
If the machine has a vibration dampener (generally on the larger chainsaw models), it is installed beneath the chain bar mounting.
- Hold the dampener in place and secure it with the supplied fastener. Bar and Chain are the workhorses of the machine and, therefore, should be maintained in good working order for the life of the chainsaw.
- Attach the saw chain to the drive sprocket. In some models, the drive sprocket is above the clutch. Orient the saw chain cutters’ sharp edges in the right direction.
- Position the chain bar so the drive chain cover studs protrude through the chain bar’s slot.
- Wrap the chain around the chain bar in the groove. Ensure that the chain tension spigot engages with its hole in the chain bar (if necessary, adjust the position of the chain tension spigot – see Adjusting Saw Chain Tension) and that the drive cover studs enter the mounting holes in the chain drive cover.
- Adjust chain tension after reinstalling chain drive cover nuts, then fully tighten (don’t overtighten).
Air Filter
Air filters keep dirt particles out of the engine, preventing internal damage. The air filter needs regular cleaning. Before starting the machine each day during use, check the air filter.
Fuel
Fill the fuel tank with the proper fuel. Use non-ethanol unleaded petrol mixed 25:1 with 2-stroke engine oil (higher RON values and sound quality 2-stroke oil). Use only fresh fuel/oil (essential to avoid contamination).
To refuel:
- Lay the machine horizontally on a level surface, with the fuel cap facing up.
- Cleaning the machine around the fuel filler prevents debris from entering the engine.
- Rotate the fuel filler cap left.
- Carefully fill the tank with fuel. Don’t overfill the tank or the filter (if equipped).
- Reinstall (rotate right) the fuel filler cap. Wipe away any leftover fuel. If fuel has spilt, move the machine away from the spilt fuel.
Saw Chain Lubricant
The saw chain and drive system require an adequate lubricant to operate safely and efficiently. Check the chain lubricant level and make sure it’s correct. The machine comes unlubricated. Only use oils designed for this specific purpose. Most good hardware stores can supply chainsaw chain oil.
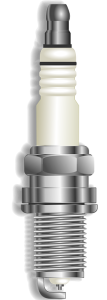
Spark Plug
The spark plug may, at times, come loose from the lead. If this is the case, place the electrical lead over the spark plug terminal and firmly connect it – applying downward pressure.
Igniting the air/fuel mixture is done by the spark plug. The spark plug needs regular care.
Cleaning
- Clean the spark plug electrodes using a brush made of wire.
- Clean threads and the top terminal.
 Adjust the spark plug “gap”:
Gauges measure the existing gap. The indicator must dangle between the electrodes (2) to be accurate.
- Close the gap to specification (see Specifications). If the gap is too large, gently tap the electrode. To widen the gap, gently pull the electrode with pliers.
- recheck the gap before reinstalling the spark plug.
Removal/Installation
- Remove the electrical lead (A) and rubber boot (B) from the spark plug terminal (C). Under the air filter cover or underneath the air filter, on some models, is where the spark plug is.
- Clean around the spark plug to prevent dirt from entering the engine.
- Remove the spark plug with the tool (D) (rotate left).
Replacing the spark plug:
- Insert the spark plug and tighten it (rotate right).
- Tighten the spark plug a quarter turn with the spark plug tool (do not over-tighten).
- Place the electrical lead over the spark plug terminal and firmly connect it.
- Replace the rubber boot, securing it firmly against the machine body. Remove any other components to access the spark plug (air filter, air filter cover).
Saw Chain Tension
Before using the saw, ensure the chain is tensioned correctly and the chain drive cover nuts are tightened. Do not check or adjust chain tension while the engine is running. The petrol chainsaw chain will “stretch” with use, so check tension before and after use.
 Tension Check
- Disengage the chain brake and turn off the engine.
- The saw chain must fit snugly into the chain bar’s groove and be hand-pullable. The saw chain should easily lift out of the chain bar groove.
- A chain that is too tight in the chain bar groove cannot be lifted out or pulled around the bar by hand.
Changing Tension
The adjustment screw is located along the front edge of the chain drive cover or on the side of the chain drive cover.
- Disengage the chain brake and turn off the engine.
- Remove the chain drive cover nuts (B). Prevent the chain bar from falling out.
The adjustment mechanism can be damaged if contaminated with sawdust, wood particles, dirt, etc.
- Replace the chain drive cover, but only screw the nut on “finger-tight” – the chain bar should be able to be lifted slightly.
- Lift the chain bar end and adjust the tension using a suitable screwdriver by rotating the adjustment screw right (clockwise) or left (anti-clockwise).
- Tighten the chain drive cover nuts while holding the chain bar.
- Check and adjust chain tension as needed.
Engine Starting and Stopping
 Engine Start-Up
When the engine seems to be cold, set the choke to “COLD”. Place the choke in “RUN” mode if the engine is hot.
- IGNITION – Turn the engine ON/OFF switch (B) to “ON”.
- DECOMPRESS – If the engine has a decompression button (generally larger capacity engines), depress it.
- START – Before pulling the starter cord, ensure the machine is on the ground and steady it with one foot on the rear handle and one hand on the top handle. When pulling the starter cord, you will feel it engage the engine, then pull it quickly. Slowly rewind the starter cord – do not “snap” it.
The starter cord may need pulling several times to fill the carburettor. Place the choke (A) in the “RUN” position, squeeze the throttle once, release it, and repeat step 3.
- WARM-UP – Let the engine warm-up. Move the choke to the “RUN” position if choking. Some models automatically shift the choke to “RUN when squeezing the throttle.”
For non-starters, repeat steps 3 and 4. If the engine still doesn’t start, see Troubleshooting.
Engine Shutdown
Release pressure from the throttle, which will, in turn, reduce the RPM, and turn the engine OFF/ON switch.
Environmental Considerations
Altitude: Carburettor adjustments at or above 1500m may be required. Generally, the air becomes less oxygenated as altitude increases, the fuel/air ratio becomes richer, and the higher the altitude, the richer the fuel mixture becomes. No adjustments are required if the engine is only used occasionally at altitude (not extreme altitudes). If the motor is continuously operated at a high altitude, an authorised service centre should adjust the carburettor.
Chainsaw Operation
Petrol chainsaws are high-speed equipment with exposed blades. Before using the equipment, please read and fully comprehend this section and all other safety warnings, recommendations, and usage instructions.
- Always use the machine in protective clothing and equipment.
- Inspect the machine for wear and damage before each use. If the machine is damaged, take it to an authorised service centre to be repaired.
- Excessive machine vibration may indicate wear or damage. Once the engine starts, the cutting blades will rotate, and parts of the machine may become extremely hot.
- If the chain brake is engaged or the saw chain is pinched, do not run the engine above idle. – running with the chain brake engaged for more than a few seconds can severely damage the clutch or chain brake mechanism, making it unsafe.
- Before using the saw, tighten the chain drive cover nuts and tension the saw chain.
- Always release chain tension after work to avoid saw chain cooling and contraction damage.
Using the Chain Brake
Brake Chain Use
 Even when the engine is running, the chain brake stops the saw chain.
- In an emergency;
- Before starting the engine.
- When transporting or storing the machine.
To use the chain brake, push the handle forwards until it “clicks”.
To disengage the chain brake, pull the chain brake handle backwards. Disengage the chain brake before cutting.
Testing
Start the engine and engage the chain brake to test it. The chain brake is working if the saw chain does not rotate after 2 seconds of full throttle. If the saw chain turns during the test, do not use the machine and have it serviced.
Inspection and Cleaning
 Operators must adequately maintain the saw chain and chain bar for efficiency and safety.
- Has broken or chipped cutters, damaged rivets, or corrosion.
- It cannot be adequately tensioned or sharpened due to “stretch”.
Soak the saw chain for 15 minutes in a proprietary saw chain cleaning solution, solvent, or ammonia/water mixture to remove dirt, grease, and resin/sap. Wash and dry the saw chain, then lubricate it.
- Bends, cracks, chips, or corrosion of the chain bar.
- The depth of the saw chain groove is no longer sufficient for the saw chain to sit correctly and run along the top edges of the chain bar groove.
Remove dirt, grease, and resin/sap from the saw chain groove and lubricant inlet hole by cleaning the chain bar with a proprietary saw chain cleaning solution, solvent, or ammonia/water mixture. Dislodge any stubborn particles from the saw chain groove using suitable tools or objects.
To remove the saw chain:
- Disengage the chain brake and turn off the engine.
- Remove the chain drive cover nuts. Prevent the chain bar from falling out.
- Carefully remove the saw chain from the chain bar groove and the chain drive gear.
- Carefully remove the chain drive cover stud.
The tension adjustment mechanism and threads are easily damaged if adjusted with a dirty tool.
Engine Tuning Guidelines
Engines may need “tuning” if it is rough, emits excessive smoke, are not revving or idling correctly, have reduced power, or does not respond crisply to the throttle. While basic 2-stroke engine tuning is not complex, it is essential to learn the tuning process, how to recognise symptoms, and where and how to make adjustments.
Note that altitude, fuel mixture, and ambient temperature can affect the engine’s performance. Improper tuning causes two primary engine conditions:
- Rich – An too rich adjustment will cause engine damage, smoke, and insufficient power when the proportions of fuel in the air/fuel mixture are too high. The partially burned mixture exits the engine as smoke. Long-term use of the spark arrestor (if equipped) and cylinder ports may cause carbon buildup. Aside from carburettor adjustments, too much oil in the fuel or old fuel can cause this.
- Lean – A lean mixture causes less power and is more likely to damage the engine than a rich mixture. The proportion of fuel in the air/fuel mixture is too low to burn. Excessive revving and lean running cause cylinder temperature to rise, causing engine seizure and connecting rod bearing failure. A lack of oil in the fuel mix and running out of fuel are other causes of lean running.
- Clean the air filter before tuning.
- Check the plug.
- Refuel.
Carburettor Tuning
The carburettor has three settings:
- Idle Speed – Determines how open the throttle is when released. A lack of air/fuel mixture causes the engine to stall when the throttle is released. When the idle speed is too high, the engine will run when the throttle is released, but at a pace that will engage the clutch and cause the saw chain to rotate.
It controls the proportion of fuel in the air/fuel mix at idle. If the low \sspeed mixture is too rich, the engine will load up when idling and then stop. A lean, low, speed mixture causes the engine to race or surge while idling.
It controls the proportion of fuel in the air/fuel mixture while working. Excessive smoke and poor throttle response may occur if the high-speed mix is too rich. A lean, high-speed mixture can cause bearing failure and piston seizure. It will also be weak in power and run hot.
Factory Settings
Defaults
Each adjustment screw has a “factory setting” that is measured from “IN” (right / clockwise) until fully seated (but not tight).
From here, count the complete rotations of the screw “OUT” (rotate left/anticlockwise).
Default settings:
- Idle Speed – 5 turns; Low-Speed Mixture – 2.5 turns.
- High-Speed Mixture – 2 turns.
Tuning starts with the factory settings. Set all adjustment screws to factory defaults, then test the engine. Before rotating the screwdriver, ensure it’s correctly engaged with the adjustment screw.
Tuning
- Start the engine and warm up – tuning cold engine results in rich running when warm. If the engine won’t idle, use the throttle to keep it running (don’t let it run continuously at high speed).
To change the idle speed:
- Turn the adjustment screw 1/4 turn in (clockwise) or out (anticlockwise) to increase or decrease it.
- Set the pace so the engine idles quickly without the clutch.
- Never set the idle so the saw chain rotates.
- Adjust the low-speed mixture if the engine won’t idle (step 3).
The adjustment screw is rotated “IN” (right / clockwise) to lean the low-speed mixture and rotated “OUT” (left / anticlockwise) to richen the low-speed mixture. The lean adjustment position is when the engine surges or wants to stop. Note the number of screw rotations to reach the lean adjustment position. Turn the adjustment screw OUT, and the engine should improve. To adjust for richness, keep rotating the screw OUT until the engine starts loading.
Compare the number of screw rotations required to reach the rich adjustment position to the lean adjustment position. Then, rotate the screw IN until the engine idles best – between rich and lean. You may need to adjust idle speed now (step 2).
Rotate “IN” (right/clockwise) to lean the high-speed mixture; “OUT” (left/anticlockwise) to richen the high-speed mixture. Screw OUT until the engine slows and runs at a moderate speed. Turn the adjustment screw IN, and the engine should run better. Screw in until the engine reaches its maximum speed. Turn the screw OUT an eighth (1/8) to a quarter (1/4) for better engine cooling.

4 comments
[…] Chainsaws Fire Rescue […]
[…] Chainsaws Fire Rescue […]
[…] Chainsaws Fire Rescue […]
[…] light trimming tasks, such as removing dead or overgrown branches and other similar chores. Electric chainsaws typically have a lower maximum cutting capacity than their gas-powered counterparts, typically more […]